- Print
- DarkLight
The 3d viewer control gives you the power to showcase your 3d models in the configurator. It allows you to dynamically compose the shown scene & change it at runtime so that the user always sees what he's about to buy.
Amongst other things, the 3d viewer gives you the following options to dynamically adjust the scene:
- Show & hide complete models
- Show & hide specific nodes of a model
- Changing certain aspects of specific nodes of a model:
- Reposition, rotate & scale nodes
- Change shown materials & adjust material details like color, roughness, metallness etc.
- Draw dynamically generated content like text or images onto nodes
Once the user is happy with what he sees, he can use the control's built in AR mode to experience the customized model in an very engaging manner.
How to show models
After creation, the 3d viewer control shows all 3d assets from all asset bundles which are assigned to your configurator.
You can use the set parameter values slot to overwrite this behavior and actively define which models it should show or not.
How to alter 3d models
You can use the set parameter values slot to control most dynamic aspects of the scene like which models & nodes are shown, which materials & colors are used etc.
Properties
Besides the general control properties like width, height, background etc., the 3d viewer control comes with some special properties:
Viewer version
The 3d viewer control is powered by our own 3d viewer and we give you the freedom to chose the exact version which should be used by the 3d viewer control.
When first creating the control, we automatically set this to use the latest available version so you don't have to touch this at all.
Please consult the 3d viewer release notes when changing the viewer version to get an idea of what might change with the new version.
The option Injected is used when extending the viewer control's capabilities by custom code. See 3d viewer control with custom code for more details on how to use this.
Load in editor
When set to false, no 3d content will be loaded when inside the design editor. This can be helpful in situations where you're working on things which are not related to the shown 3d content like overall configurator layout or logic.
This setting only affects the design editor & does not change the 3d viewer control's behavior in preview or published configurators.
Autofocus model
Defaults to true, which automatically autofocuses the camera after the visibility of a certain model has been changed. The camera will be zoomed in as far as possible while the whole scene content remains visible.
This behaviour is benefitial for simple projects, as the user won't get lost in the scene after switching models. However it is more of a hinderance if the camera is controlled via custom code.
In this way the user can deactivate the autofocus behaviour by setting this flag to false.
If this flag is set, the viewer control will also automatically adapt the ground size and mesh list for shadow generation according to the scene content, defined by the currently visible models.
This only takes effect if dedicated ground meshes and shadow lights are available, which is the case if the "Grounded" scene asset is selected.
Scene asset
A "scene asset" represents a collection of settings that define the appearance of a scene.
It includes:
- light elements, shadow configuration and environment
- camera limits and settings
- environment meshes like ground or skybox
- global scene settings like background color
You can choose a "Grounded" scene asset or "-", if none should be used.
Grounded
The "Grounded" scene asset comes with a ground mesh, that receives shadows from the currently visible models.
These shadows are created by a directional light, which serves as an additional lighting source to the environment texture.
Also the camera can not move underneath the ground, making the scene appear more realistic.
Environment URL
This property is deprecated and will be ignored if the "scene asset" property is used, as the environment texture is part of the scene asset.
The environment is responsible for reflections and indirect lighting of the 3d scene. Without it and without any other lights, all materials in the 3d scene are rendered completely black.
See Babylon.js docs for further info about environments and IBL in general.
This property defaults to a environment asset provided on the Babylon.js server.
You can change the property either via providing a static url or a hive value.
The latter is the preferred one, as you can access environment files from the asset editor and adjust the environment at runtime in this case.
Slots
You can use the following slots the 3d viewer control to interactively change the 3d scene and its shown 3d content at runtime:
Set parameter values
The set parameter values slot is the central piece of the 3d viewer control which lets you adjust the scene to your likings & change it based on the users input in the configurator.
This slot lets you:
- Define which 3d models are visible or not
- Use the viewers parameter system to show or hide nodes & set other parameters like used materials, color, position etc.
Basic usage
The set parameter values slot needs to be connected to a value component which creates a list of records from the Viewer3d type parameter functions modelParameter, tagParameter, nodeParameter or materialParameter.
E.g.:
[
  // Set visibility of 3d models
  //
  //                      3d asset path,          parameter name, value
  Viewer3d.modelParameter(Models3d.CoffeeCup,     "visible",      true),
  Viewer3d.modelParameter(Models3d.CoffeeCoaster, "visible",      false),

  // Set parameter values using the tagging system
  // Here: Show all nodes which contain the tag "Handle" and hide all nodes
  // which contain the tag "Cap"
  // Also set "metallic" value to 1 for all materials which contain the tag "Metal"
  //
  //                    Tag name, parameter name,   value
  Viewer3d.tagParameter("Handle", "visible",        true),
  Viewer3d.tagParameter("Cap",    "visible",        false),
  Viewer3d.tagParameter("Metal"   "metallic",       1),

  // Set parameter values using the node system
  // Here: Hide the node with the name "Spoon" & set a material for it which
  // will be applied once the value of the "visible" parameter is changed to
  // `true` at a later point
  //
  //                     Node name, parameter name, value
  Viewer3d.nodeParameter("Spoon",   "visible",      false),
  Viewer3d.nodeParameter("Spoon",   "material",     "SilverMat"),

  // Set parameter values using the material system
  // Here: Set color red and roughness 0.1 to material "matHandle"
  //
  //                         Material name, parameter name, value
  Viewer3d.materialParameter(Materials3d.matHandle,   "color",        "(255, 0, 0)")
  Viewer3d.materialParameter(Materials3d.matHandle,   "roughness",    0.1)
]
In real live, you'll usually get the parameter values from other components whose result changes based on some user input or product logic:
[
  // "CupIsVisible" & "HandleColor" are components
  Viewer3d.modelParameter(Models3d.CoffeeCup, "visible", CupIsVisible),
  Viewer3d.tagParameter("Handle", "color", HandleColor),
]
Available 3d models
With Viewer3d.modelParameter you can show or hide all 3d assets from all asset bundles which are assigned to your configurator.
Available tag, node and material parameters
With the tag, node and material parameter functions you can either use the viewers built in parameters or you can use custom parameters which are defined & handled by custom code.
The available built in parameters for nodes are the following:
- visible
- material
- position
- rotation
- scaling
- influence
The available built in parameters for materials are the following:
- color
- roughness
- metallic
Some parameters require an advanced parameter value structure.
You can use built-in Hive functions, which return the value in the expected stringified structure:
[
  // move node to position x=1, y=0, z=0
  Viewer3d.nodeParameter("Spoon", "position", Viewer3d.vector3(1, 0, 0)),
  // set rotation around y to 90 degrees
  Viewer3d.nodeParameter("Spoon", "rotation", Viewer3d.vector3(0, 90, 0)),
  // invert scaling in z direction
  Viewer3d.nodeParameter("Spoon", "scaling", Viewer3d.vector3(1, 1, -1)),
  // set color to "red" (FF0000)
  Viewer3d.materialParameter(Materials3d.matHandle, "color", Viewer3d.color3(255, 0, 0)),
  // set morph target influence value of morph target "morphTarget1" from node "node1" to 0.6
  Viewer3d.tagParameter("node1", "influence", Viewer3d.morphTarget("morphTarget1", 0.6))
]
In addition to the "basic" material parameters mentioned above, you can also use texture parameters for materials. Texture parameters are available for multiple "channels" (e.g. albedoTexture, bumpTexture) in the material, therefore the parameter configuration has to be defined as dotted path.
[
  // assign checker texture to albedo channel of material "matBox"
  Viewer3d.materialParameter(Materials3d.matBox, "albedoTexture.image", Textures3d.Checker),
  // update "uScale" value depending on a component value
  Viewer3d.materialParameter(Materials3d.matBox, "albedoTexture.uScale", uScale)
]
The available texture channels are the following:
- albedoTexture
- metallicRoughnessTexture
- bumpTexture
- emissiveTexture
- opacityTexture
- ambientTexture
- lightmapTexture
- detailmapTexture
Built in parameters for these texture channels are the following:
- image: supports url and svg strings
- uOffset
- vOffset
- uScale
- vScale
- uAng
- vAng
- wAng
- clampU
- clampV
- uvSet
According to the underlying Babylon.js engine, "detail maps" require an additional flag for activation.
This flag can be adjusted with the useDetailmap parameter.
[
  Viewer3d.materialParameter(Materials3d.matBox, "detailmapTexture.image", Textures3d.Checker),
  Viewer3d.materialParameter(Materials3d.matBox, "useDetailmap", true)
]
Tags can be used for nodes and materials alike, therefore viewer3d.tagParameter supports all built in parameters in general.
Custom parameters
When using custom parameters, you pass the name defined by setParameterObserver to Viewer3d.tagParameter, Viewer3d.nodeParameter or Viewer3d.materialParameter.
See 3d viewer control with custom code to get more information about how to define them in custom code.
Set environment URL
Allows you to use an environment from the asset editor and/or change the environment dynamically at runtime.
Usually you use an environment from the asset editor by creating a value component which provides the URL of the environment file using the following Hive rule:
// "Cups3d" = Name (or alias) of bundle assigned to configurator
// "env" = Folder name in which "studio" is located
// "studio" = Asset name
Cups3d.env.studio.url
You can then connect this component to the Set environment URL slot.
See environment URL property for more details about environment files in general.
Auto focus camera
This slot can be used to move the camera to a position where all active nodes in the scene are visible.
Calling this slot with default parameter values also adjusts the cameras panning sensibility as well as its pinch & wheel precision to provide a good usability regardless of the size of the shown models.
The slot accepts the following optional parameters to adjust this default behavior to your likings:
Alpha,Beta&Radius factorto adjust the final camera position.Adjust panning sensibility,Adjust pinch precision&Adjust wheel precisionto define whether those camera settings should be auto adjusted or not.Exclude tags&Exclude nodesto exclude the given nodes from the calculation.
Both those parameters expect a coma separated list of node or tag names liketagName1, tagName2, tagName3.
See the viewers autofocusActiveCamera for more details about the parameters.
Start AR
The AR mode can be activated with the Start AR slot.
The viewer automatically detects if the device is capable of showing the model in an augmented reality environment. The minimum requirement for an AR capable device is that it comes with a camera (mobile phones, tablets), but also some browser and operating system limitations are considered.
Have a look at Googles AR core documentation for more details about AR capabilities.
AR capable devices
If the device is AR capable, the augmented reality scene will be entered automatically.
The user will be redirected to the corresponding app, which is responsible for showing the configured 3d model in the AR environment.
Non AR capable devices
If the configurator is started from a PC or if the used mobile device doesn't match the AR requirements, the viewer will show a QR code instead, which can then be scanned by an AR capable mobile device.
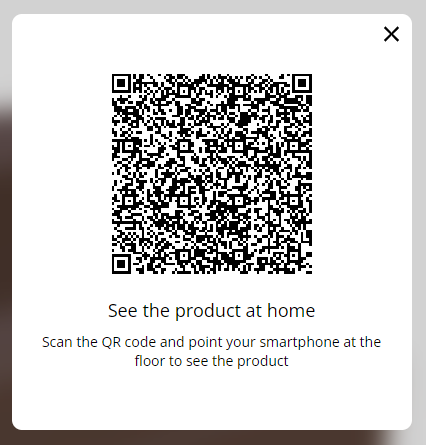
The QR code will lead to the exact same AR endpoint that would be reached when starting the AR journey from an AR capable device directly.
Slot parameter
QR subtitle,QR description: Customizable text for QR code layer ("See the product at home" & the text below in the screenshot above).Preparation text: Customizable text for the load mask which is shown whilst the 3d model is being prepared for the AR scenePopup blocked title,Popup blocked description,Popup blocked link text: Customizable text that will be shown if the AR endpoint can't be reached due to a popup blockerExclude tags,Exclude nodes: Filter for hiding certain nodes in the AR sceneEnvironment: HDR environment for the AR viewer on the mobile deviceLoading screen logo: Image URL for logo on the AR loading screen
How to draw dynamic content on the 3d model
You can use texture parameters for drawing images on certain meshes.
Check out the "Decals" chapter to find out how to create such meshes on the Combeenation platform. You can also target existing meshes as basis for the texture parameter.
Anyway in most cases albedoTexture.image is the preferred option, but other texture channels can be used as well.
For example bumpTexture.image works well for engravings.
Here are some tips and tricks for practical usage of these parameters.
Use
GraphicView.Value.ToText()to use the content of a Graphic component as texture image[ Viewer3d.materialParameter(Materials3d.matPaintable, "albedoTexture.image", PaintableGraphic.Value.ToText()) ]Use additional texture settings parameter like
uScale/vScaleto scale or invert your texture anduOffset/vOffsetfor tweaking the position on the desired mesh[ // negative UV scaling for inverting the image Viewer3d.materialParameter(Materials3d.matPaintable, "albedoTexture.uScale", -1), Viewer3d.materialParameter(Materials3d.matPaintable, "albedoTexture.vScale", -1) ]Create individual components for texture image parameters with large string values (eg: SVGs)
The whole component value will be updated by the server, whenever a change within the component has been detected.
This can lead to larger network load if large string values are involved, which can be the case when using SVGs or data strings in the texture image parameter.It can be avoided, if the parameters are split across multiple components.
Each of these parameter components has to be linked as an individual"set parameter values"slot though.// ❌ Don't: Single component "ParameterValues" [ Viewer3d.tagParameter("Handle", "visible", HandleVisible), Viewer3d.tagParameter(Materials3d.matHandle, "color", HandleColor), Viewer3d.materialParameter(Materials3d.matPaintable, "albedoTexture.image", PaintableGraphic.Value.ToText()) ] // If component "HandleVisible" changes, the whole content of the component // "ParameterValues" will be updated, even if the graphic component // "PaintableGraphic" didn't even change // => 🔥 Lots of unnecessary network load// ✅ Do instead: Split into 2 components with 2 SigSlos: // Component "StandardParameterValues" [ Viewer3d.tagParameter("Handle", "visible", HandleVisible), Viewer3d.tagParameter(Materials3d.matHandle, "color", HandleColor), ] // Component "PaintableGraphicParameterValue" [ Viewer3d.materialParameter(Materials3d.matPaintable, "albedoTexture.image", PaintableGraphic.Value.ToText()) ] // If component "HandleVisible" changes, only the component // "StandardParameterValues" will be updated // Component "PaintableGraphicParameterValue" stays untouched // => 👍 Less network loadBe cautios when interacting with other properties of the affected material
4.1 Albedo Color
The materials albedoColor, which is set by the "color" parameter, will be layered with the "albedoTexture" from the albedo texture parameter.
The resulting texture will be a mixture of "albedoTexture" and "albedoColor" .
If this is not desired, make sure to set the "albedoColor" to white, in this case the paintables original color will be preserved.
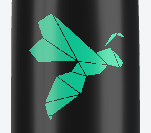
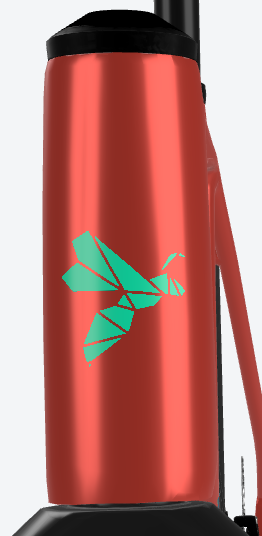
Texture with turquoise color, albedo color is set to white.
Original turquoise color is preserved.
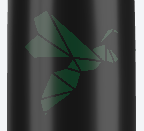
Turquoise texture overlapped with red albedo color.
Original turquoise color is altered.
This also works the other way around. If you want to control the paintables color via the "albedoColor" property you have to make sure, that the original albedo texture image is completely white as well.
4.2 Transparency Mode
You may face the issue that transparent areas of albedo texture images appear black.
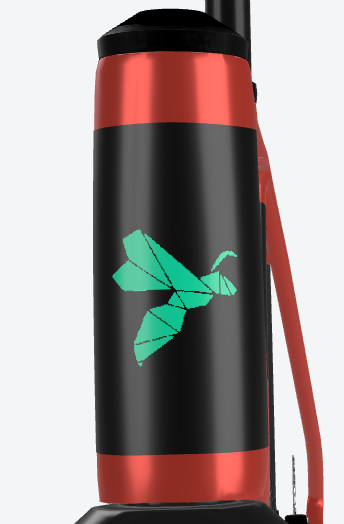
This can be fixed by tweaking some material settings:
- set transparencyMode of the desired material to 2, which is "alpha blend".
- activate useAlphaFromAlbedoTexture
- activate albedoTexture.hasAlpha
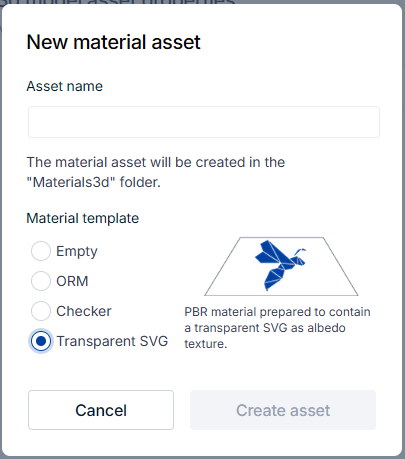
These properties are automatically set when creating a material asset from the "Transparent SVG" template.
Extension with custom code
If you need more functionality than the 3d viewer control provides out of the box, you can use custom code to extend it by adding custom parameter observers, adjusting the viewer settings and much more.
See 3d viewer control with custom code for more details on how to do this.


