- Print
- DarkLight
"Decals" are used to create details, like badges or logos on existing meshes.
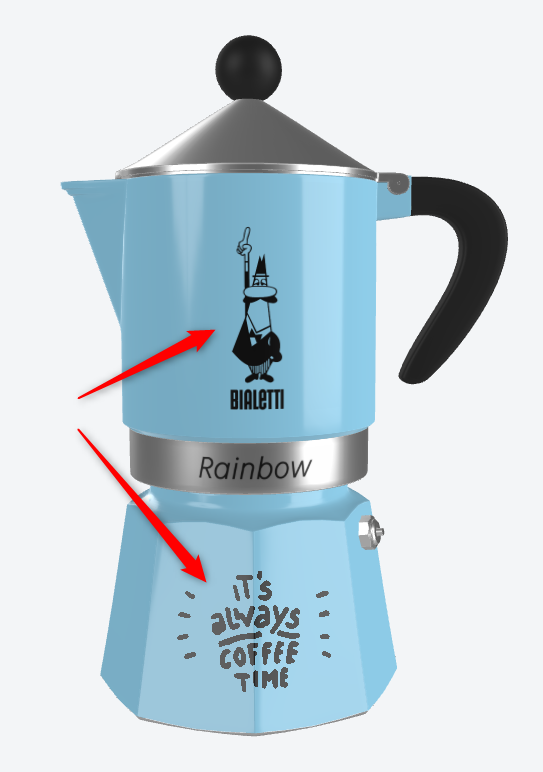 Although such details can also be created inside the 3d model itself, having a customizable editor on the Combeenation platform provides certain advantages:
- Change decal configuration like position or size without having to re-upload the 3d model
- Works with any 3d model, no need for special preparation
- Integrates smoothly into other parts of the Combeenation 3d framework, such as material assets and tags
The basis for this feature is the "Mesh Decal" functionality from Babylon.js.
The output of such a decal is just a mesh.
Now you can assign material assets to that mesh or use it in the 3d viewers parameter system to bring life into that decal.
You may also want to have a look at this chapter for drawing dynamic content on the decal mesh.
How to create a decal
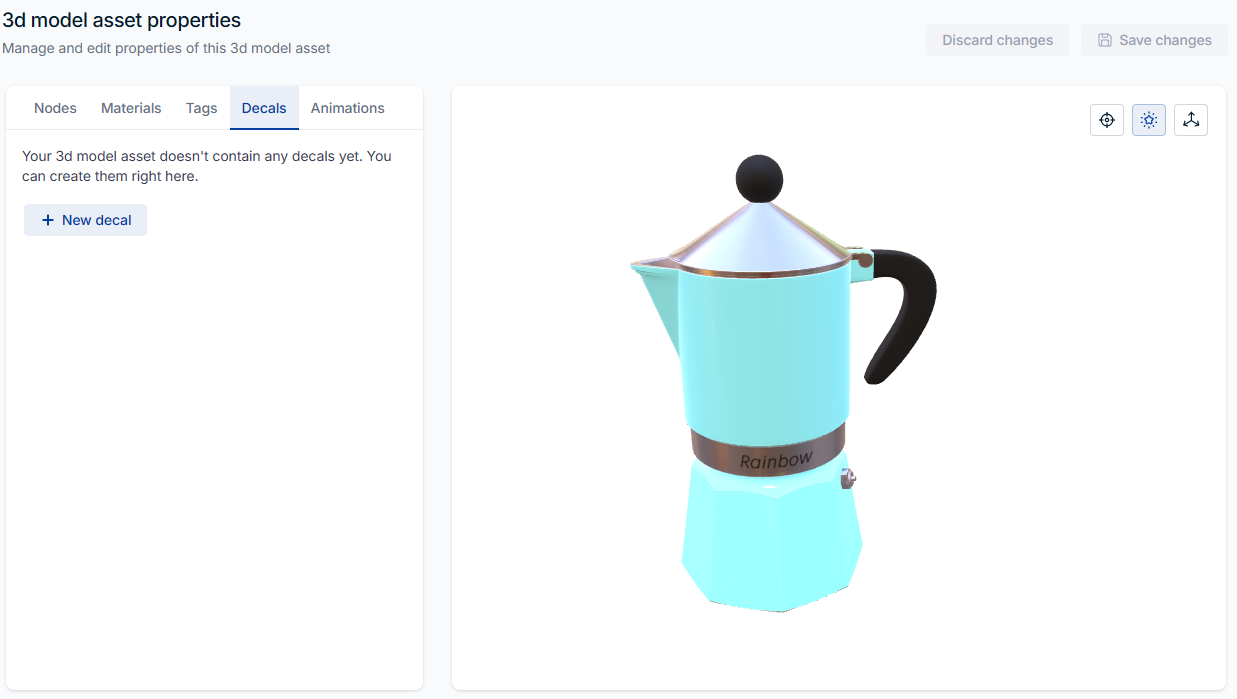
First navigate to the "Decals" tab of your 3d model and press "New decal".
This action will open a new modal dialog, where you can enter the name of the decal, the "parent mesh" and the associated material.
The parent mesh setting is important, as it defines on which mesh the decal geometry will be created.
You can choose an existing material, or add a new one.
Since decals often use textures with transparent areas, it is typically a good starting point to create a material from the "Transparent SVG" template.
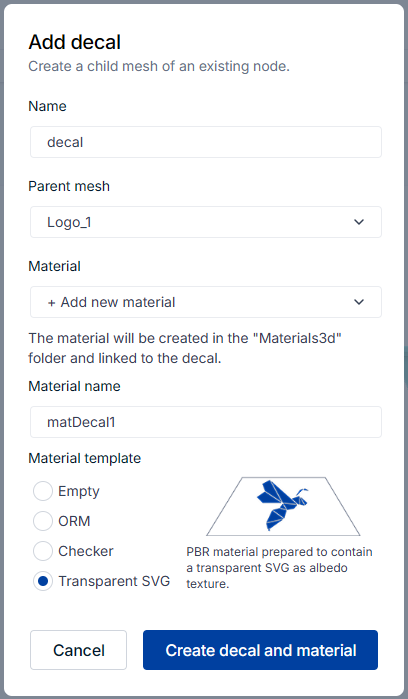
You can still change all of these settings in the editor at a later step.
The decal geometry is the result of the intersection between the parent mesh and a fictive box, that can be tweaked by the editor in the "Geometry" section.
When opening the "Geometry" section you will see a box with blue edges appear. This box can be used to adjust the geometry data in an interactive way, since finding the correct data for the box geometry can be very tricky.
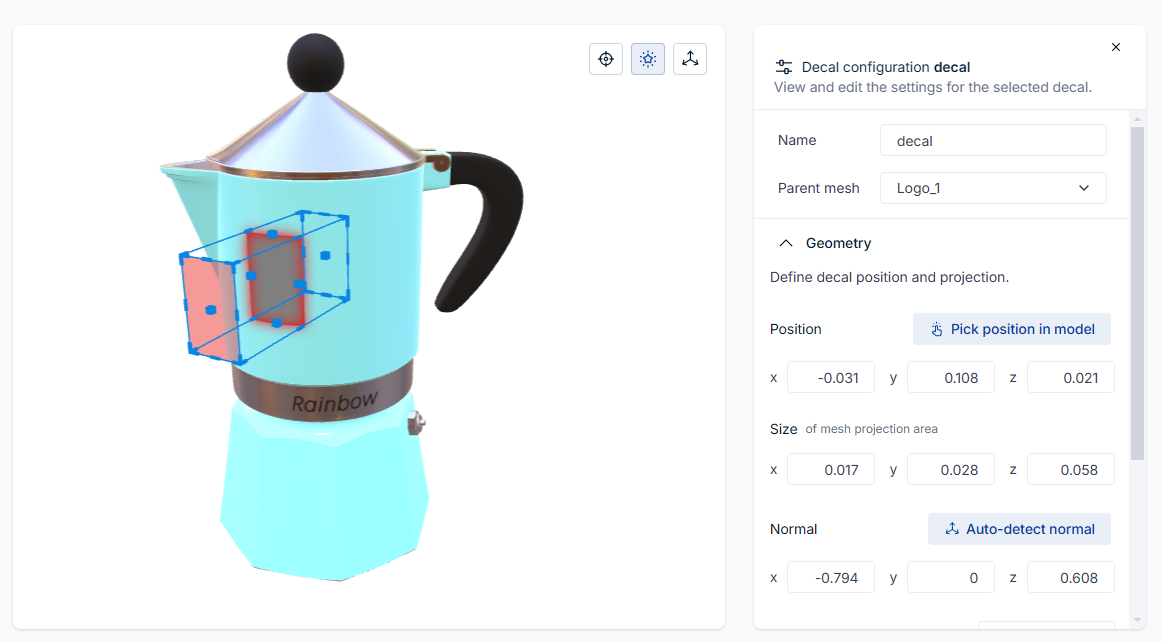
Anyway here is an overview of the geometry settings:
- Position: center of the box
- this is not necessarily the position of the final decal
- you can change the position interactively by dragging the box in the scene
- use "Pick position in model" to define the box position via mouse click, this is typically a good starting point
- Size:size of the box
- use the gizmos on the corners and areas of the blue overlay box to adjust the size interactively
- Normal:"main" (= z) direction of the box
- required to indicate the first intersection area if "Cull back faces" is active
- the front side, which is pointing towards the normal vector, is indicated by the red plane
- use the gizmos on the edges of the overlay box to adjust the rotation of the box
- use "Auto-detect normal" to align the decal box normal vector with the normal vector on the intersection area, this leads to undistorted intersection areas
- Rotation angle: rotation around the normal vector in degree
- edge gizmos may also affect the rotation around the normal vector
- Offset: distance from the parent mesh
- if the decal would be located exactly on the intersection surface, "clipping" effects would occur, therefore the decal has to be positioned slightly in front of the parent mesh
- each vertice of the decal is shifted along its normal vector, so that round surfaces will be scaled as well
- in praxis this value will be very low (e.g. 0.001), since too high offsets will be visible as gaps between the parent and the decal mesh
Additional settings
- Capture UVs:
- false: creates a "standard" UV mapping across the decal mesh
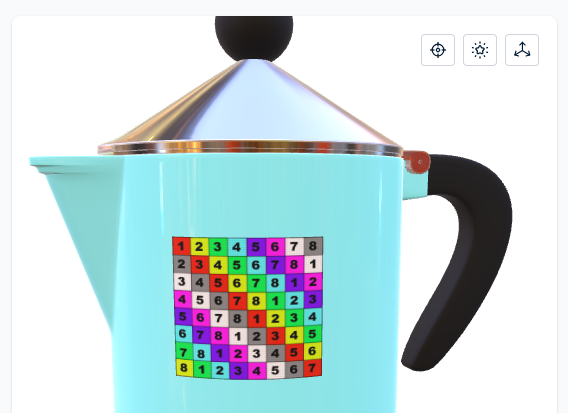
- true: uses the UV mapping of the parent mesh on the intersection area
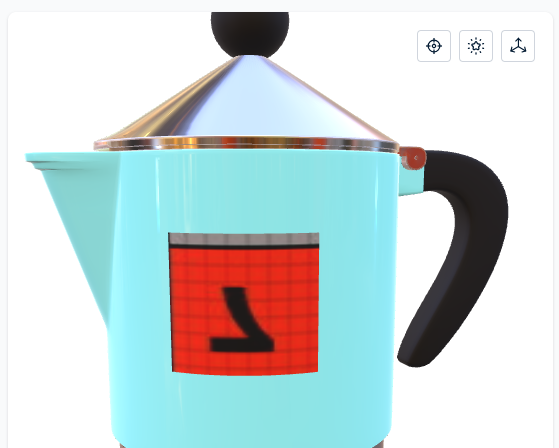
- false: creates a "standard" UV mapping across the decal mesh
- Cull back faces:
- true: decal is only created on the first intersection with the parent mesh
- Local mode:
- true: creates decal mesh as child of the associated parent mesh, in this way transformation of the parent mesh will also be applied on the decal mesh
- false: creates decal mesh in world space (without parent mesh)
- NOTE: this setting has NO effect on the initial position of the decal
- Use glTF side orientation:
- activate this flag if the decal will be created underneath a "glTF root node", which has a negative scaling in z direction
- otherwise the faces will be flipped, leading to invisible decals
- CAUTION: this flag directly relates to "Local mode", as "Local mode" decides if the decal is created underneath a parent hierarchy or not


