- Print
- DarkLight
Prerequisite
The following guide assumes that the following prerequisites are met. Otherwise please see the more detailed guide about Custom Code.
- A Combeenation configurator with basic functionality (some Components, Design, etc.)
Node.js&npm(or some equivalent)- Visual Studio Code (our recommended IDE, but not mandatory)
- Basic knowledge about these tools
Setup
- In a terminal navigate to the folder where your project should be created
- Run
npm create @combeenation/custom-code@latest - Follow the instructions of the script
Local development
After the setup is done:
- Run
npm run devinside your code project - In the browser, open the preview of your configurator draft
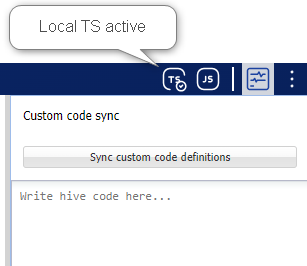
- On the top right click the TS-icon (Toggle local custom TS)
- This will simply add the query parameter
&localcts=trueto your URI
- This will simply add the query parameter
Coding
[Optional] Create a test Component
In your configurator create a simple Value Component called MyTestCmp with the rule
Input or "Hello World"
We will refer to this Component in the upcoming snippets.
Get Components in code
At this point, our code is runnable but it has no knowledge about the Components yet. To communicate with them, we provide an auto-generated typescript-file which can be easily synced with our tools.
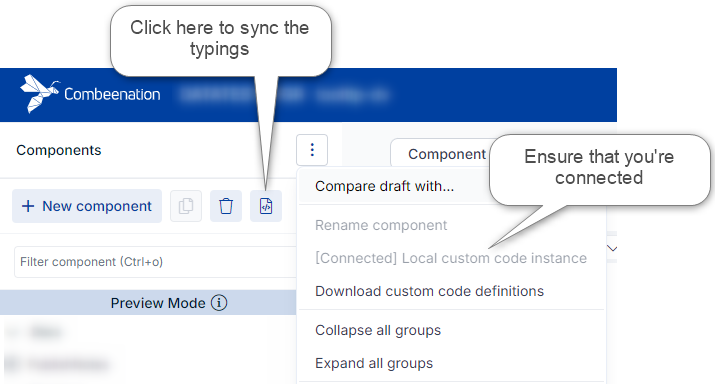
The required UI controls are automatically available as soon as you open a preview which is properly connected to the local environment.
Configurator Preview

Configurator Editor

Simply click on one of the "Sync buttons" and your Components will instantly be available in your IDE.
With every change in the Components you can click this button again to update them.
At its core, this feature updates the file under src\typings\cfgr-defs.generated.ts.
Entry point
Inside the index.ts you will find the following:
CfgrUtils.onCfgrReady(() => {
});
This is the main entry point of the configurator which ensures that your configurator is fully up and running.
Any kind of initialization code which communicates with the configurator should happen in here.
Read the value of a Component
// See above how to get Components
import { MyTestCmp } from './typings/cfgr-defs.generated';

CfgrUtils.onCfgrReady(async () => {
   const myValue = await MyTestCmp.getValue();
   console.log('RESULT: ', myValue);
});
Write (set input) of a Component
// See above how to get components
import { MyTestCmp } from './typings/cfgr-defs.generated';

CfgrUtils.onCfgrReady(() => {
   MyTestCmp.setInput('Hello from custom code!');
});
Listen to a Component change
// See above how to get components
import { MyTestCmp } from './typings/cfgr-defs.generated';

CfgrUtils.onCfgrReady(() => {
   // MyTestCmp.setInput('Hello from custom code!');

   MyTestCmp.onValueChanged(newValue => {
    console.log('value updated: ', newValue);
  });
});
Communicate with controls
The controls can be accessed via their unique name.
To prevent hard-coded strings inside the code, we recommend to extend the enum CtrlNames {} which is already pre-defined under src\constants.ts.
// constants.ts
export enum CtrlNames {
  JS_DummyBtn = 'JS_DummyBtn',
}
// index.ts
import { CtrlNames } from './constants';

CtrlUtils.onCtrlClicked(CtrlNames.JS_DummyBtn, () => {
    // your code
});
Other utils & helpers
For a full documentation of the available functions see custom-code.docs.combeenation.com
Quick overview of other, often used, functions:
- Listen to multiple components at once (e.g. to prevent multiple calls of the handler-function)
CmpUtils.onAnyCmpValueChanged(_update3dModel, [Cmp1, Cmp2, Cmp3]); - Create PDF from HTML which is directly stored/uploaded as "Configuraton File"
CfgnFiles.createPdfFromHtml('bom', htmlContent);


